How to Fix Paintless Dent Repair: A DIY Guide
Dents and dings on your car’s body can be frustrating, but they don’t have to mean an expensive trip to the auto body shop. With the right techniques and tools, you can tackle many types of dents through a process called paintless dent repair (PDR). This DIY-friendly approach allows you to massage the dent from the inside out, restoring your car’s smooth, flawless finish without the need for paint work.
Understanding Paintless Dent Repair
Paintless dent repair is a specialized technique that uses a variety of metal tools to gradually reshape the dented area from the backside of the panel. By slowly and carefully massaging the metal, the dent can be gradually pushed out, restoring the original contour of the panel. This process is ideal for shallow to moderately deep dents that haven’t resulted in any cracking or paint damage.
The key advantage of PDR is that it allows you to fix dents without affecting the existing paint. This makes it a much more cost-effective solution compared to traditional body filler and repainting methods. Plus, with a little practice, you can achieve professional-level results right in your own garage.
Tools and Materials Needed
To get started with paintless dent repair, you’ll need the following supplies:
– Dent repair tools (including pulling rods, body hammers, and dent removal tools)
– Bright work light or inspections light
– Plastic protector cards
– Painters’ masking tape
– Microfiber cloths
– Isopropyl alcohol
The specific dent repair tools you’ll need will vary depending on the size and location of the dent, as well as the curvature of the affected panel. Many starter kits are available that provide a selection of the most commonly used tools.
Preparing the Dent for Repair
Before you begin the repair process, it’s important to properly prepare the dent area. Start by thoroughly cleaning the affected panel with isopropyl alcohol to remove any dirt, debris, or contaminants. This will help ensure a smooth, even finish.
Next, use the bright work light or inspection light to closely examine the dent. This will help you assess the depth, size, and shape of the damage, allowing you to select the appropriate tools and techniques. Make note of the dent’s location, as this will determine the best angle of approach.
If the dent is located near trim pieces or other delicate areas, use the plastic protector cards and painters’ masking tape to shield these surfaces from potential damage during the repair process.
Performing the Dent Repair
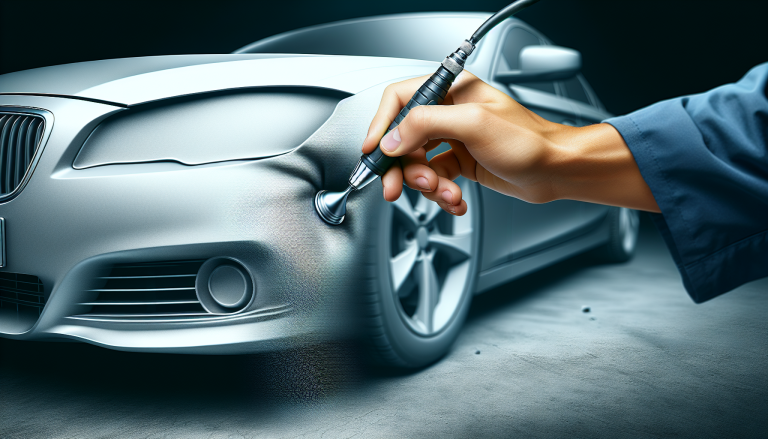
With the dent area properly prepared, you can begin the paintless dent repair process. Start by selecting the appropriate dent removal tool for the job. Smaller dents may require the use of a mini-hook tool or a small body hammer, while larger dents may need a larger pulling rod or specialized dent repair tool.
Gently insert the tool into the backside of the dent, positioning it as close to the center of the damaged area as possible. Apply steady, even pressure, and slowly begin to massage the metal outward, working your way from the center to the edges of the dent.
It’s important to work slowly and carefully, taking your time to gradually reshape the panel. Avoid applying too much force, as this can potentially cause further damage or create new dents. Instead, focus on gentle, incremental movements that gradually restore the original contour of the panel.
As you work, continually check the progress of the repair using the bright work light. This will help you assess whether the dent is being properly aligned and identify any areas that may require additional attention.
If the dent is particularly deep or stubborn, you may need to use a combination of tools and techniques to achieve the desired result. This could involve using a body hammer to lightly tap the metal from the front side, while simultaneously using a pulling tool on the backside to lift the dent.
Finishing Touches
Once the dent has been sufficiently reshaped, use the microfiber cloth to gently buff the affected area. This will help smooth out any minor imperfections and blend the repaired section seamlessly with the surrounding panel.
If the repair is successful, the dent should now be virtually undetectable, with the original paint finish intact. However, it’s important to note that paintless dent repair is not suitable for all types of damage. Deep dents, creases, or dents with paint damage may require more extensive body work and re-painting.
Remember, the key to successful paintless dent repair is patience, attention to detail, and a steady hand. With some practice, you can master the techniques and achieve professional-grade results on your own. For a visual demonstration of the PDR process, check out this [no-follow hyperlink to demonstration video].
The difficulty level of paintless dent repair can vary depending on the size, depth, and location of the dent. Generally, shallow to moderately deep dents on flat or gently curved panels are the easiest to tackle, while dents on more complex, heavily contoured areas may require more skill and experience. As a beginner, it’s recommended to start with smaller, less complex dents before tackling larger or more challenging repairs.
By mastering the art of paintless dent repair, you can save yourself the time and expense of traditional body work, all while maintaining the original finish and value of your vehicle. With the right tools, techniques, and a bit of practice, you can become your own “DentMaster” and keep your car looking its best.